This post is part of Getting Started series and is meant to be read after Getting Started II: Choosing Your First Shows. As with all posts in this series, this advice is based on our experience, and, like all things, should be taken with a grain of salt.
Something to note is that not all shows require an application. Many, especially smaller shows (such as the ones we recommend when starting off) are less formal. In cases such as these it’s often enough to message the organizer and express interest. In most cases, the organizer will ask you what you make. This is to avoid multiple vendors offering the same thing. If they don’t ask you this, consider that before proceeding. (You can read more about protecting yourself.)
However, many shows do follow a more formalized application process. These shows are either partially juried (require application but accept vendors as they come in or juried (set deadline, adjudication after deadline). How do you apply for these?
E-mail Address
Consider making a separate email exclusively for your business. Having a dedicated email makes your application look professional and established. If you do want to use your personal email, make sure it’s appropriate. This will not only help with applications but with your customers as well. No one wants to email banana_hammock123@gmail.com looking for…well, anything other than Speedos. (But if you sell Speedos, honestly, I recommend that!)

Social Media
Your social media accounts, especially the ones for your business, are your resume online. You don’t need to have every social network to begin with (or ever, really), but consider setting up a Facebook page and Instagram account. Having a handful of pictures of your work means that organizers who are checking it out can get a better feel for your look and feel. Having these accounts also gives your customers the ability to follow you and see your new products.
Application Forms
Pay attention to the form and complete the fields diligently. It can be easy to get excited and rush through it – don’t. Treat it like a test. If there are questions asking for your company or product description, put some thought into it! For example, the question “Describe your business.” can be answered:
“I sell tumblers, mugs, and signs.” or
“I craft a variety of products, including tumblers, mugs, and signs drawing inspiration from nature, popular trends, and culture. I aim to offer something for everyone but have a focus on witty and sassy sayings. These aren’t your grandma’s tumblers! I use high-quality materials to ensure my creations are long-lasting and can be cherished.”
Which one do you think better presents this imaginary business? Take the time to tell organizers a bit about yourself, what inspires you? Is it your kids? Your love of current events? Animals? Nature? There is a balance to be found between brevity and expressing yourself – take some time to sit down and figure out a vision for your business.
Tip: If you are a Vendor+ member, most application forms, where applicable, can be found directly linked on the event page.
Photographs
Photographs are incredibly important. Both on social media and with applications – they are the single most important way to present and promote your business and products. If you are in direct sales, you already have professional product photography at your fingertips – use them. For other vendors, like handmade and vintage it is up to you to take these photos.
I won’t get into an indepth discussion of advanced photography tips in this post, but I do have three considerations for you as you start off:
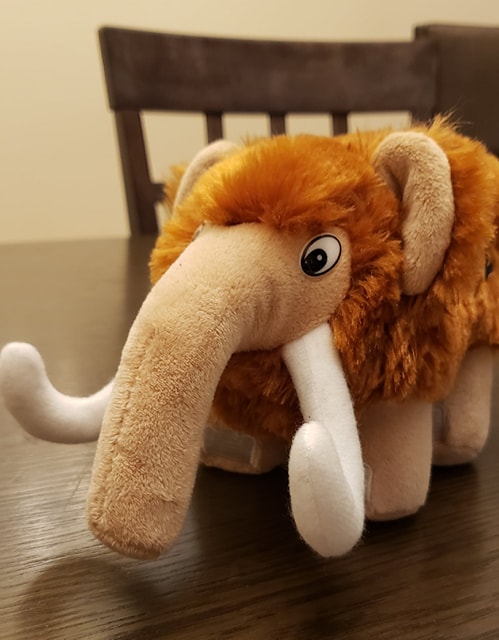
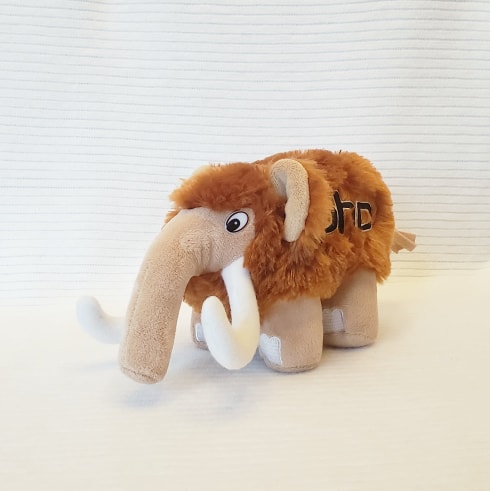
- Lighting: Make sure your photos are well lit, preferably with natural light. Set up your product across from a large window.
- Background: Use a blanket (fleece ones from IKEA or Dollarama work well) or bristol board (if you have smaller items) to create a consistent background that allows your products to pop.
- Breathing Room: Take a step back. Leave enough room around your items in your photos for the viewer to be able to get a sense of scale, and take in the whole item. An exception for this is detail shots, but you should have at least one photograph of the entire item.
For the two comparison photographs below I used my cell phone (Samsung S9+ camera) and Snapseed (free phone app) for editing. I have access to a professional-grade camera, but I wanted to use my cellphone to show that these changes do work using what you have available.